
A silver streak shows up off a rocky point. By the time you get a clear look, the near end has gone dark. A little farther out, another strip of smooth water ends in a crooked row of wavelets. Which one gets the first cast?
Watch both against the tip of the point. If the silver patch slides past while the wavelets keep forming in roughly the same place, you've got two different leads. Look up-drift for another fresh patch. At the wavelets, look for a place to land a lure in the smooth approach and let current carry it to the edge. Here's how to make that choice from a deck or a dry rock.
Look across the slick
Start with a swell you can follow by eye. Watch it roll out of ruffled water, through the patch, and out the far side. The swell keeps going. What's changed inside the patch is the fine stipple that the breeze raises on its back. With the sun ahead of you, the smoother face can flash silver. From the other side the same patch can look like dark slate. Follow the boundary where the little ripples fade.
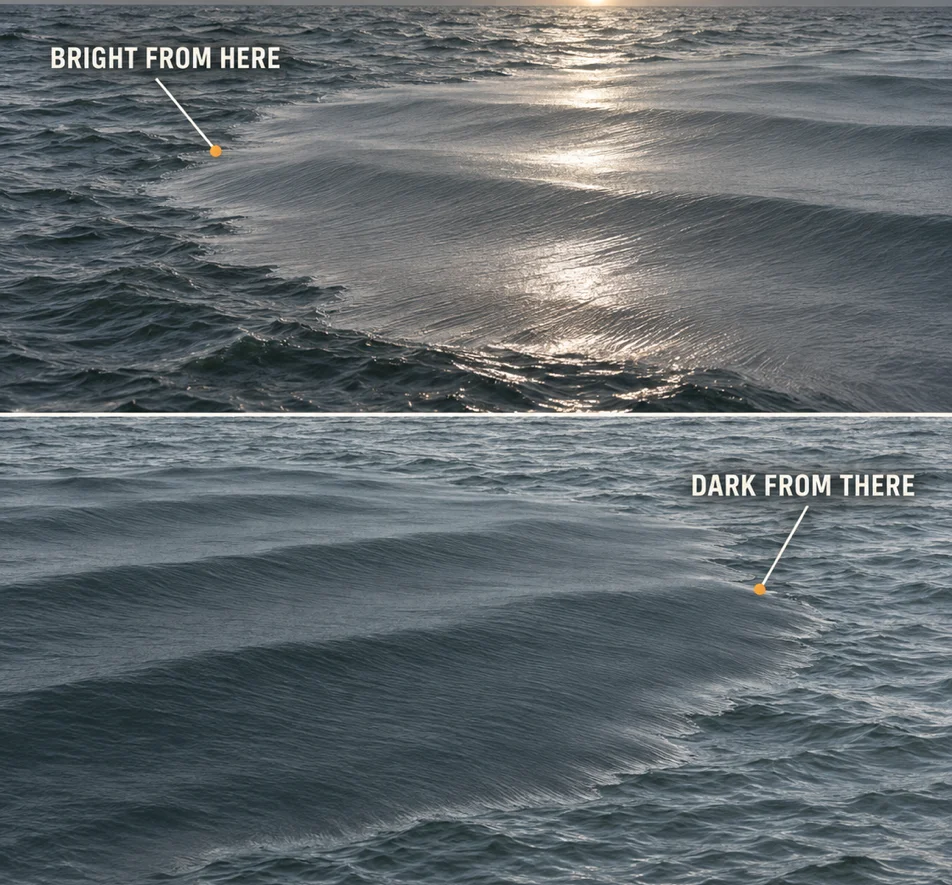
A natural surface film can damp small waves, and current can gather film along fronts and eddies. That makes a slick a useful way to see water movement. It leaves open the question every angler cares about: what made this particular patch worth a cast? A smooth pocket tucked behind a jetty may simply mark the lee of the rocks. Follow it toward the exposed tip. If the wind ruffles return as soon as the shelter ends, you've got a good explanation for the flat water. Gade and colleagues, Oceanography
Find where the next patch starts
A long slick gives you plenty of water to cast at. Before you spend a drift covering it, pick out its compact end and watch the water just beyond it. Does another little patch appear there as the first one stretches away? Two patches forming near the same place give you a much better starting point than the far end of an old streak. A fishy smell may earn the spot another look. You still need another clue to identify what is feeding.
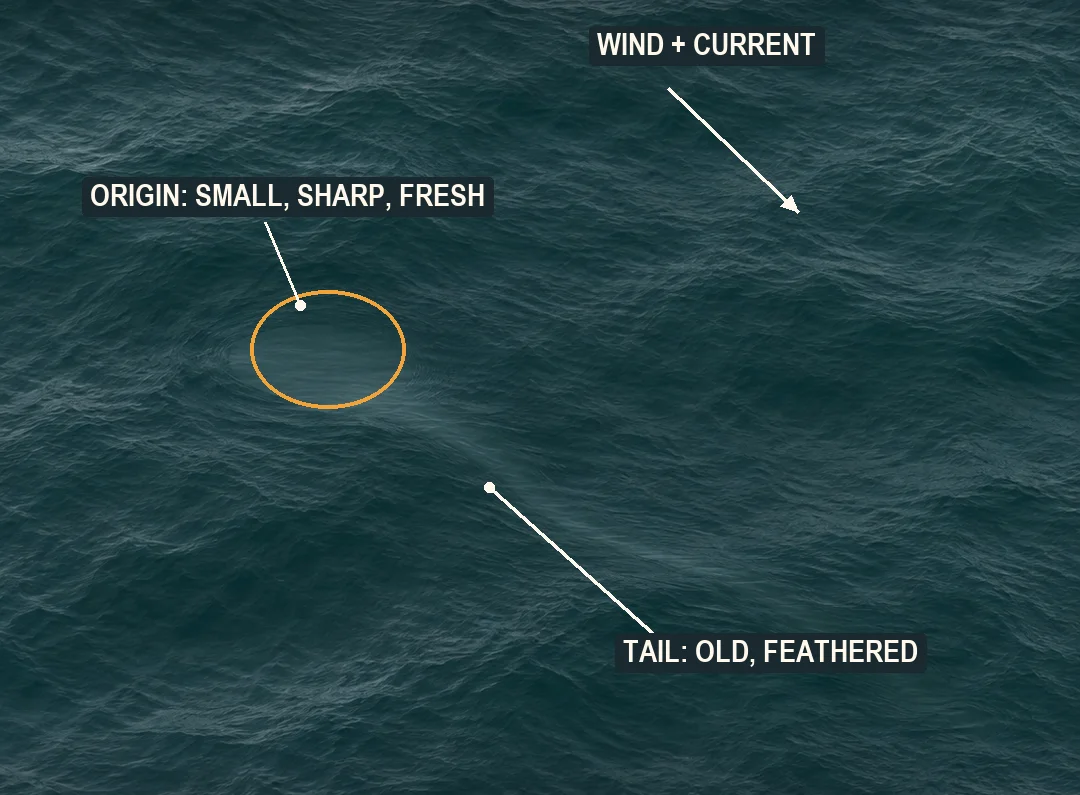
From a boat, stay off to one side while you watch. Running up the middle makes your own wake the most obvious feature on the water. From a beach, look along the strand before trying to add yards to the cast. Walking up-current on dry sand can bring the compact end into range and give the lure room to travel across it. If the patch has dispersed and nothing new forms, turn your attention to nearby structure. A point with a working seam gives you a specific next cast.
Recognize the rip underneath the surface picture
Over a shoal, moving water crosses a rise in the bottom. In the example below, the smoother approach is on the left. Short standing waves develop over and beyond the rise. Water and anything drifting in it travel through the line, even as those little crests keep rebuilding near the same piece of bottom. You can often see that difference by watching one bit of weed pass a bend. A modest wrinkle can be enough to pick out the edge.
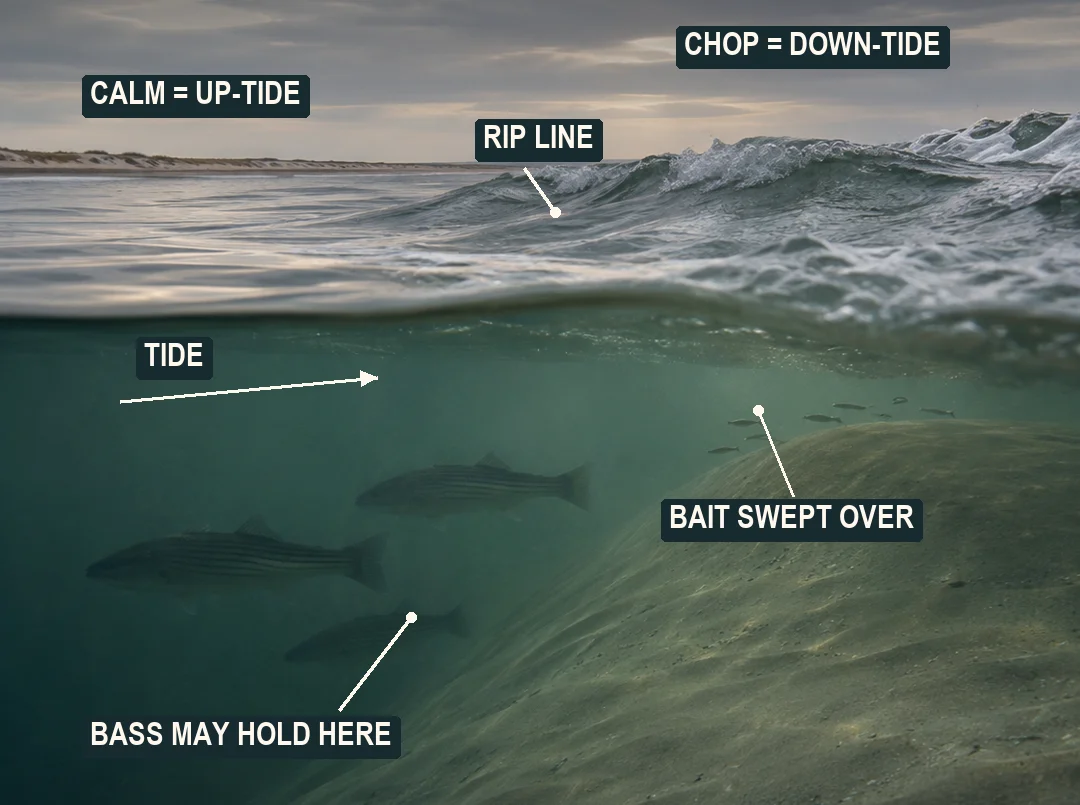
The bass in the cutaway show one place to try. Fish can also use a pocket behind the rise or feed along its shoulder. Look along the line for a bend within range or a gap between two patches of chop. Pick one and see where your lure crosses. A gap is visible from the surface. Its depth and what is holding beneath it are questions for a chart, a sounder, or another pass.
Watch what happens as the flow eases. A line you could follow a few minutes ago may be hard to find near slack. Record which way the water was actually moving while the seam was defined. That detail is more useful on your next visit than simply writing down “high tide.” For a closer look at the bottom features that create these lines, see how to read a rip.
From a boat, give the lure room to swing
In the diagram, the boat's bow points into the current on the smooth side. The white tide arrow points toward the chop. The solid amber line is the cast out to the side. Follow the dashed part next: the current takes the lure toward the rip while the boat stays back. This is a setup for a helmsperson and an angler who agree on the target before the cast.
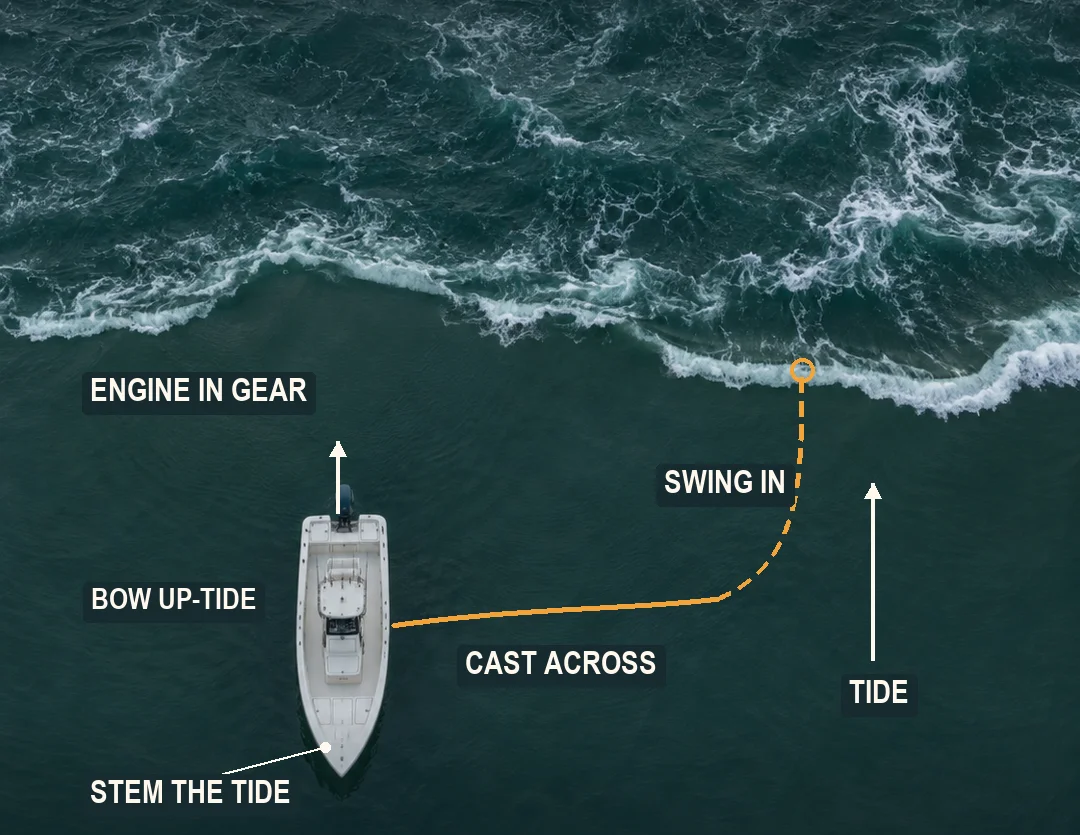
Watch the landing as carefully as the retrieve. If the lure splashes straight into the rough water, the current has already spent the approach you wanted to fish. Land the next cast a little farther up-tide. If a big belly of line sweeps into the chop ahead of the lure, gather enough of it to feel what the lure is doing. Keep someone at the helm. If holding position takes all their attention, give the line more room or leave it for another tide.
From shore, work the near end first
Stand back on dry ground and follow the seam out from the point. On the downstream side, a fleck of foam may curl back toward the rocks while another keeps moving out in the main flow. The strip of water between those paths is reachable with a shorter cast than the far end of the rip. Start there, especially if the longer cast would drag your line across rocks on the retrieve.
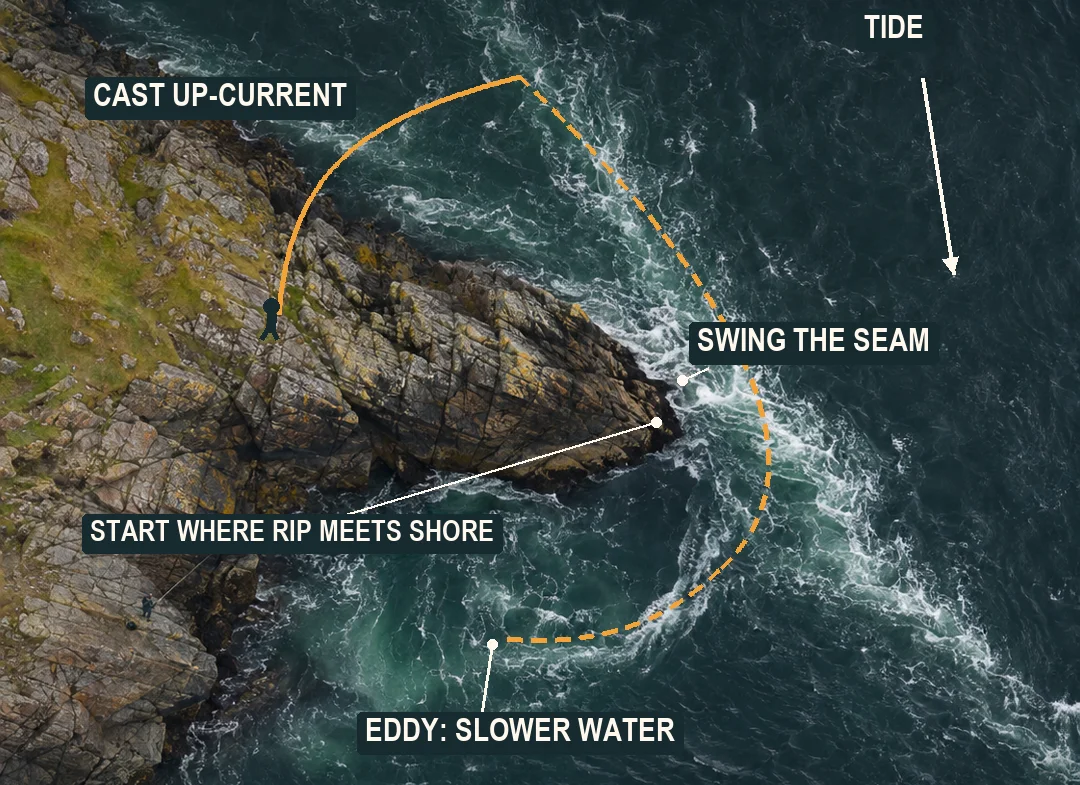
Land the lure up-current and across, then watch where the swing brings it alongside the slower pocket. If it comes straight back to your feet, change the landing angle from the same safe footing. There is no need to step farther out for a second attempt. Scout the approach in daylight, wear a PFD on jetties, fish with a partner, and leave if waves wash over the rocks or your way back.
What to take back to this spot
In StripedLines, look up the local current before heading out. At the water, check that prediction against the direction the weed actually travels. For your own notes, save the landmark, the direction of flow, and where your lure crossed the edge. “On the ebb, the swing reached the pocket just inside the point” gives you something you can try again. A fresh slick can draw your eye to a different piece of water next trip. The notes tell you what to look for once you get there.